In this Lab Experiment, we will use the NetworkScanner introduced in the live session to detect a smartphone on the network. It will provide an indicator 'at home' and 'away from home' that we will use to control the light.
- Step 1 Retrieve your phone MAC address
- Step 2 Implement the contextual behaviour
- Step 3 Map the flow of your code
In our last assignment, we have implemented the script discover.py to scan the network and find the IP Address of our lightbulb. This enables us to automatically create a Lightbulb object and control the lightbulb without specifying a fix IP address.
During the live session, we explored how to refactor this initial code into a NetworkScanner class which keep scanning the network for devices. You can copy and paste the snippet available on the page of Module 4 in a file discover.py.
This NetworkScanner can send us events when new devices are found on the network and when devices are no longer connected.
Step 1 Retrieve your phone MAC address
Task 1.1 Create a NetworkScanner
In main.py, locate the following lines:
lightbulb_ip_address = find_lightbulb("192.168.1.1/24")
lightbulb = Lightbulb(lightbulb_ip_address, LIGHTBULB_THING_IP, LIGHTBULB_PRIVATE_KEY_PATH)
Replace then with:
# create an object NetworkScanner
scanner = NetworkScanner("192.168.1.1/24")
# set the handler function for the events on_connect and on_disconnect
scanner.on_connect = on_device_connect_to_network
scanner.on_disconnect = on_device_disconnect_from_network
# start scanning
scanner.start_scanning()
What is 192.168.1.1/24? This is the range of IP addresses we want to scan. If the IP address of your lightbulb was different from 192.168.1, then replace the three first digits by the one from your lightbulb. /24 is called ‘Net Mask’ in the network jargon. It means that we will look for IP addresses that have the same three first digits, and any value as fourth digit (from 1 to 255).
For instance, our scanner will be able to find a device 192.168.1.5 or 192.168.1.134 or 192.168.1.231. However, it will not look for 192.168.200.5 because 200 does not match the third digit.
Task 1.2 Define handlers
In this new code, we note that we set two handler functions: one for the on_connect events and one for on_disconnect events. We need to define these two functions. Let’s do this in main.py as follows:
def on_device_connect_to_network(device):
 print("Connected device:")
 # print device information
 device.show()

def on_device_disconnect_from_network(device):
 print("Disconnected device:")
 # print device information
 device.show()
We can now execute main.py.
However, on Mac and Raspberry Pi, you need to execute your code with as administrator for Scapy to work properly.
For this, add sudo in front of your command:
sudo python src/main.py
Note: Make sure that your phone is connected to the same network as your lightbulb and current machine.
It will print the MAC address of all the connected device to your connected network, including your lightbulb as TP-Link.
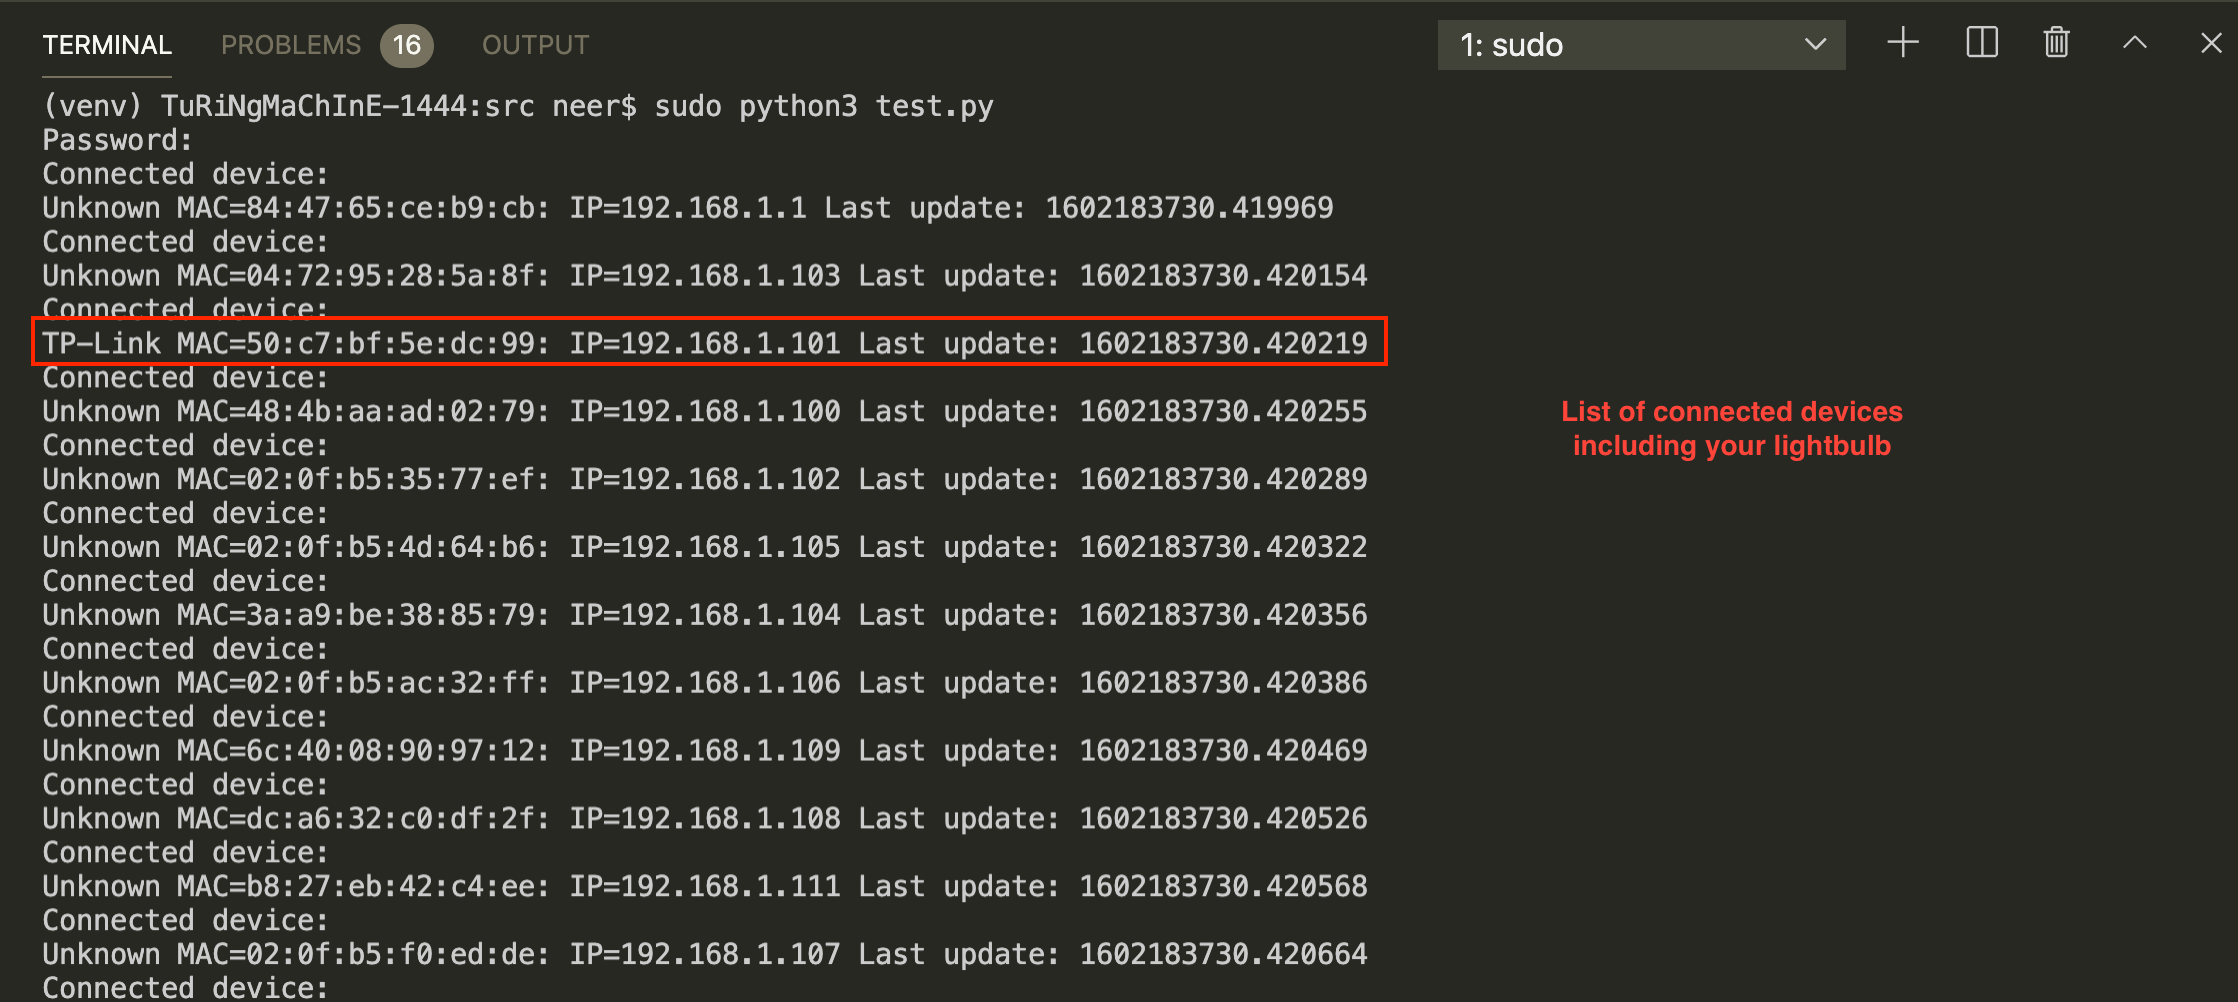
Task 1.2 Identifying devices per vendor
Our code shows the IP and MAC addresses of the devices as they connect on the network. However, most addresses should appear with the name ‘Unknown’: nothing tells our code what is the relationship between MAC address and vendor.
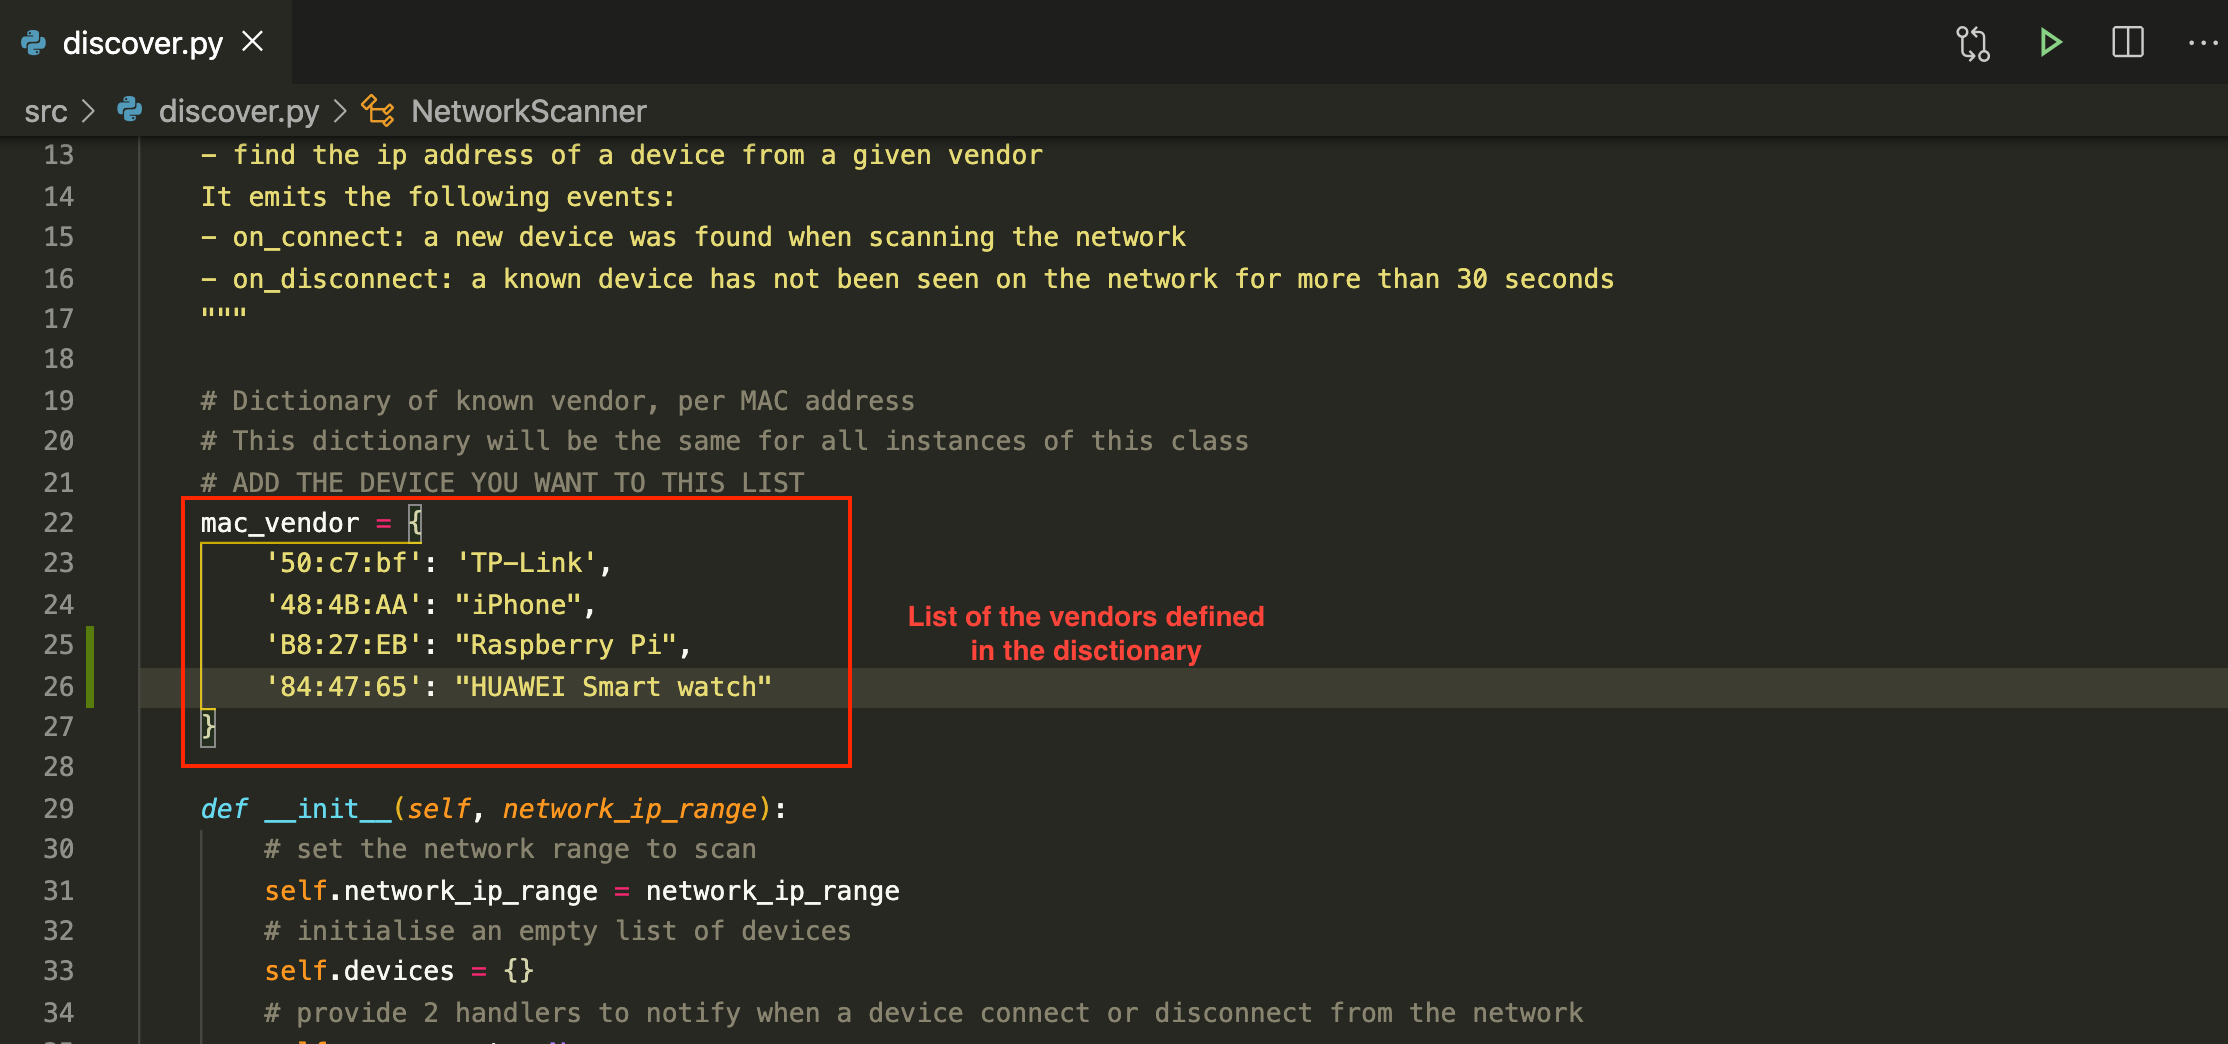
Follow Step 3 from Assignment 4 to obtain the vendor’s name, and then add it in mac_vendor dictionary defined in discover.py script. Each team member can add the vendor of the devices they want to recognise.
Here is an example of an updated list:
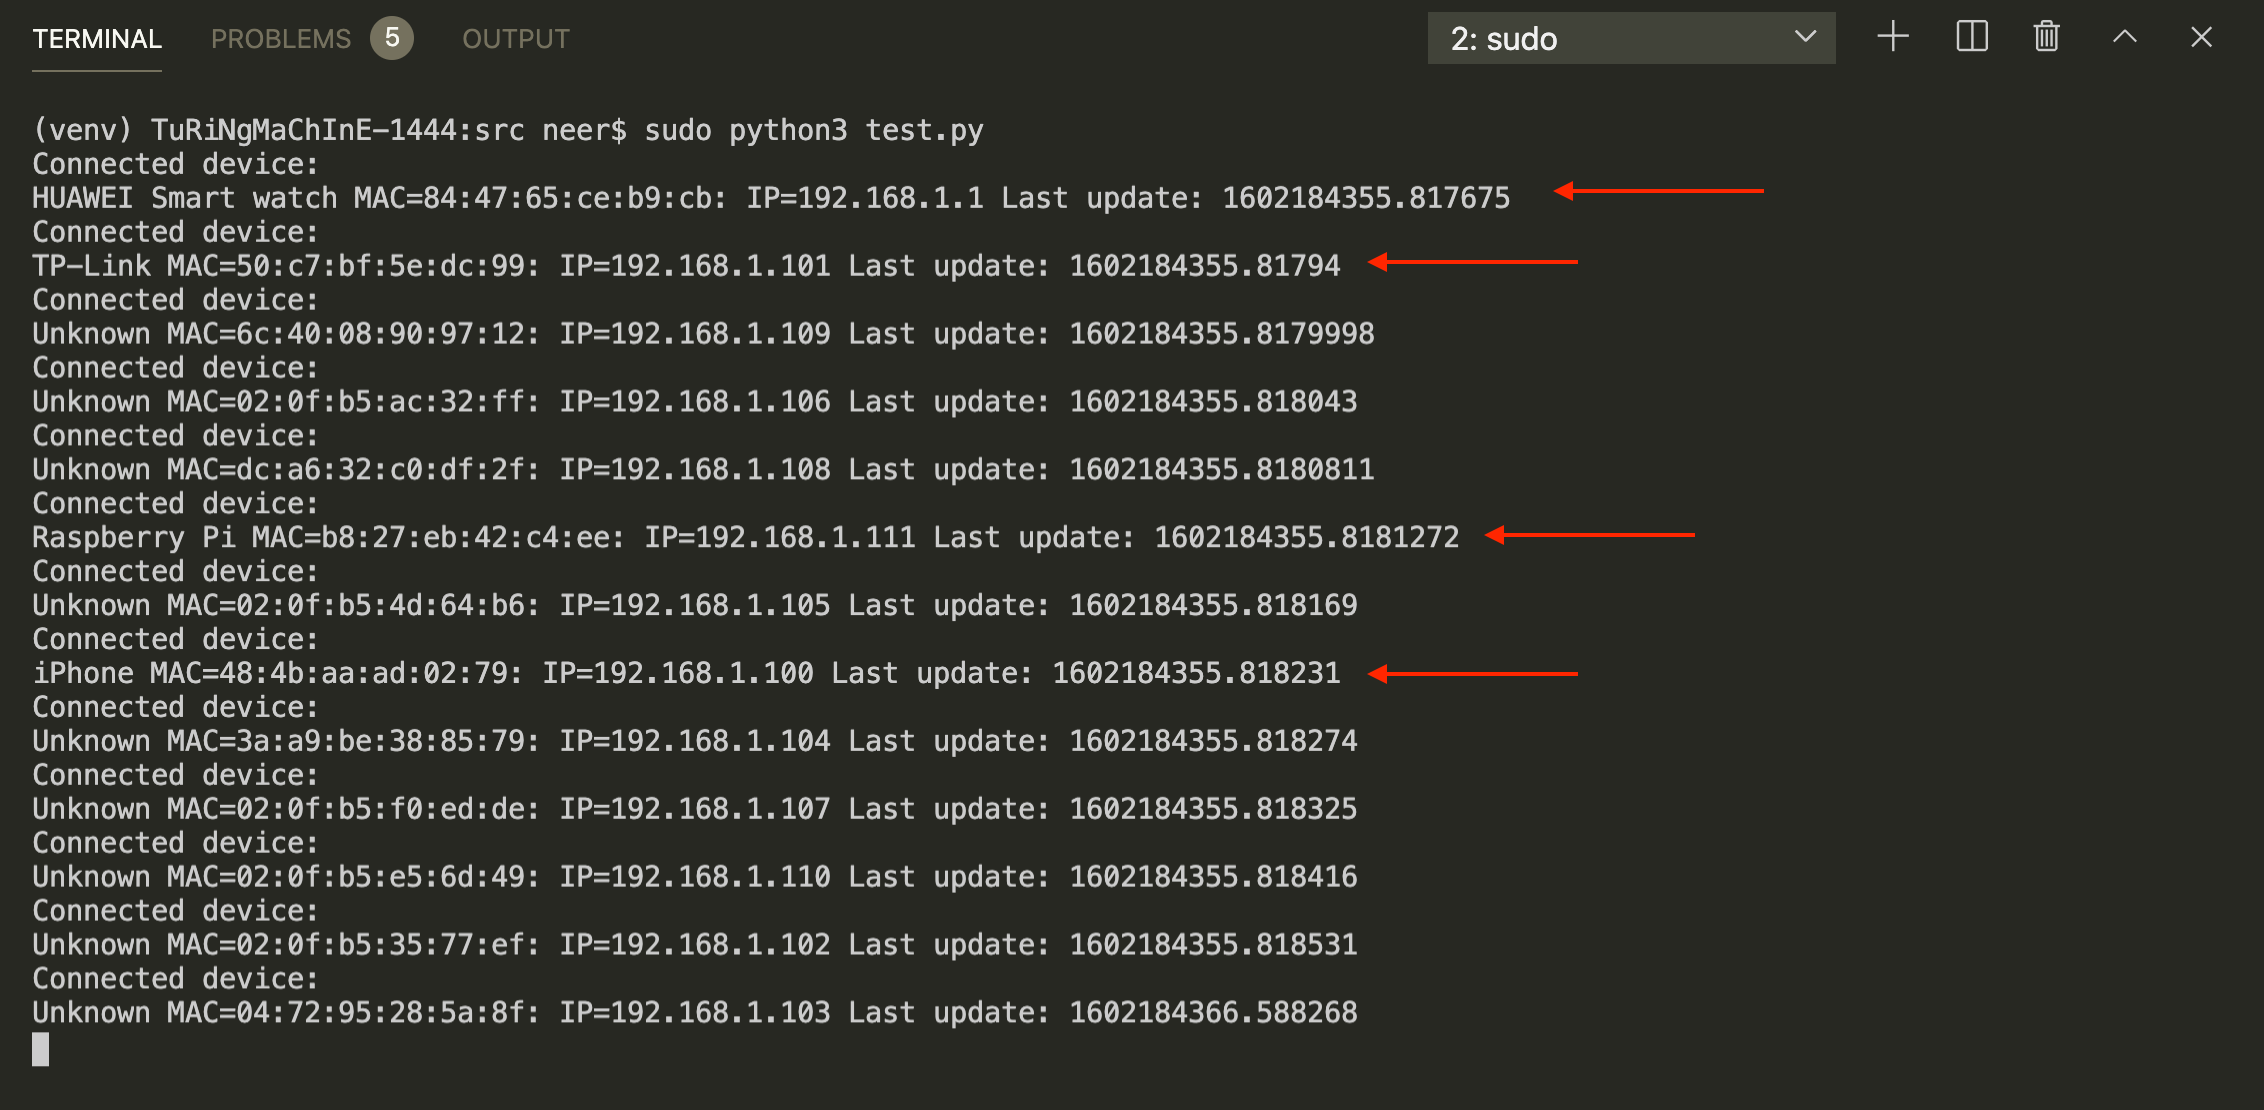
Executing your code again, it should show the name of your devices. For example:
Step 2 Implement the contextual behaviour
Our code is now retrieving the details of the devices connected on the network, including the lightbulb, Pi and your phone. It is also associating MAC addresses to vendors for the one we specified in the mac_vendor dictionary. Now we can use the on_connect and on_disconnect events in two ways:
- to connect to the lightbulb when it is found
- to control the lightbulb when our phone connects to or disconnects from the network. This could represent an event ‘At Home’ and ‘Away from home’.
To do that, you can improve the two handlers in main.py. In the on_connect() you need to create a lightbulb. You can use the code of the Lightbulb class we provide in Module 2. Then, add the condition and the call of turn_on() call to control the light. In the on_disconnect(), add the condition and the call of turn_off().
def on_device_connect_to_network(device):
    device.show()

    # condition to check the device name,
    if device.name == 'TP-Link':
        print('lightbulb back on the network')
        # create a lightbulb object and print bulb status

    # condition to check the device name
    if device.name == 'Phone':
        print('At home')
  # If a lightbulb is connected
         # turn ON the lightbulb

def on_device_disconnect_from_network(device):
    if device.name == 'TP-Link':
        print('Connection lost with the lightbulb')

    if device.name == 'Phone':
        print('Away from home')
  # If a lightbulb is connected
         # turn OFF the lightbulb
This is an example of control based on the network event. You can now involve the sensor events and your lightbulb pulse() or morse() as part of the flow.
Step 3 Map the flow of your code
While the code of main.py is not too long, the flow is complicated. Let’s visualise the code.
Have a look at the NetworkScanner class, the LightBulb class and your main.py. Create a flow chart of your code to map the process. For instance:
- what are the steps?
- are there elements executed in parallel?
- are there conditions?
Report On GitHub, in your lab experiment report, report your process of integrating the NetworkScanner in your code. Explain with your own word how the NetworkScanner works. Describe the flow from detection to action on the lightbulb. Add your flow chart.
Upload this flow chart in your repository.
Merge and Push Once you are done with your development and test cycle, do not forget to merge your branch into your master branch.
You can now try your code on the Raspberry Pi.
Updating the CHANGELOG file In this lab experiment you have made significant additions to your prototype. Edit the file
CHANGELOG.mdand add what you have achieved in this assignment.
![]()
![]()
![]()
The European Commission's support for the production of this publication does not constitute an endorsement of the contents, which reflect the views only of the authors, and the Commission cannot be held responsible for any use which may be made of the information contained therein.