In this assignment, you will design and evaluate network architecture for your GoodNight Lamp prototype. Then, you will explore how to discover devices on the network to automatically find your lightbulb IP address.
- Step 1 Design Network Architecture
- Step 2 Scan the Network
- Step 3 Associate MAC addresses to Vendors
- Step 4 Find the lightbulb automatically
Step 1 Design Network Architecture
Let’s take a step back from coding for a moment. Based on the self-study material, we have a better overview of the network jargon. Through this course, we provide a possible design of the GoodNight Lamp. An architecture that relies on the Internet protocol, with a Raspberry Pi as Hub and a WiFi-enabled lightbulb. From the teaching perspective, it enables to touch on all core aspects of a connected product. However, this is certainly not the only possible nor best network architecture.
Use your knowledge on network jargon, the network topologies and physical network protocols to design six different network architectures of the GoodNight Lamp (or two per students, besides the architecture used in this course).
Report On GitHub, create a new file in your docs directory named ‘alternative_architectures.md’. Describe each network architecture with a text and a diagram. Use a Markdown table to compare the six architectures based on the criteria introduced in the self-study material. Finally, sort them from the most to the least viable and write a text to motivate this ranking.
Step 2 Scan the Network
In this step, we will start analysing our local network by scanning the devices currently connected. We will use the python package scapy for this. As usual when you open VS Code and your Terminal, make sure you load your virtual environment. Install scapy using the pip.
Then, we create a file discover.py and paste the following code:
from scapy.all import ARP, Ether, srp

def scan_network_devices(target_ip):
    # create ARP packet
    arp = ARP(pdst=target_ip)
    # create the Ethernet broadcast packet
    ether = Ether(dst="ff:ff:ff:ff:ff:ff")
    # Stack them
    packet = ether/arp
    # Send and receive packet
    result = srp(packet, timeout=5, verbose=0)[0]
    # a list of devices, we will fill this in the upcoming loop
    devices = []
    for sent, received in result:
        # for each response, append ip and mac address to `devices` list
        devices.append({'ip': received.psrc, 'mac': received.hwsrc})
    # Finally we return the list of devices
    return devices
- Here we import ARP, Ether and srp from
scapy. - ARP (for Address Resolution Protocol) is the protocol which takes care of converting IP Addresses into MAC Addresses.
- We prepare to send our ARP packet to all devices connected (broadcast MAC Address with all
ff:ff...). - The function
srp()stands for ‘send and receive packets’. Through this action, we will send a message to all devices on the network (ethernet broadcast) to ask them who has what IP address (ARP message). The timeout parameter is the number of seconds we wait for responses. You can increase/decrease this time if you do not catch all your devices. - The rest of the code is a for-loop, going through each device response to build a dictionary ip/mac.
We could use the following function to call our scanner and show the results.
def show_network_device(target_ip):
    # Let's find the devices connected to the network
    devices = scan_network_devices(target_ip)
    print("Available devices in the network:")
    print("IP" + " "*18+"MAC")
    for device in devices:
        print("{:16}    {}".format(device['ip'], device['mac'])))
Let’s call this function at the bottom of the file:
show_network_device("192.168.1.1/24")
We can now execute the script. Note: we need the admin right to execute scapy, thus we will use the command sudo which will prompt for your machine user password.
sudo python discover.py
Step 3 Associate MAC addresses to Vendors
For each result found on your network, look up the MAC address on the following website: https://maclookup.app/search.
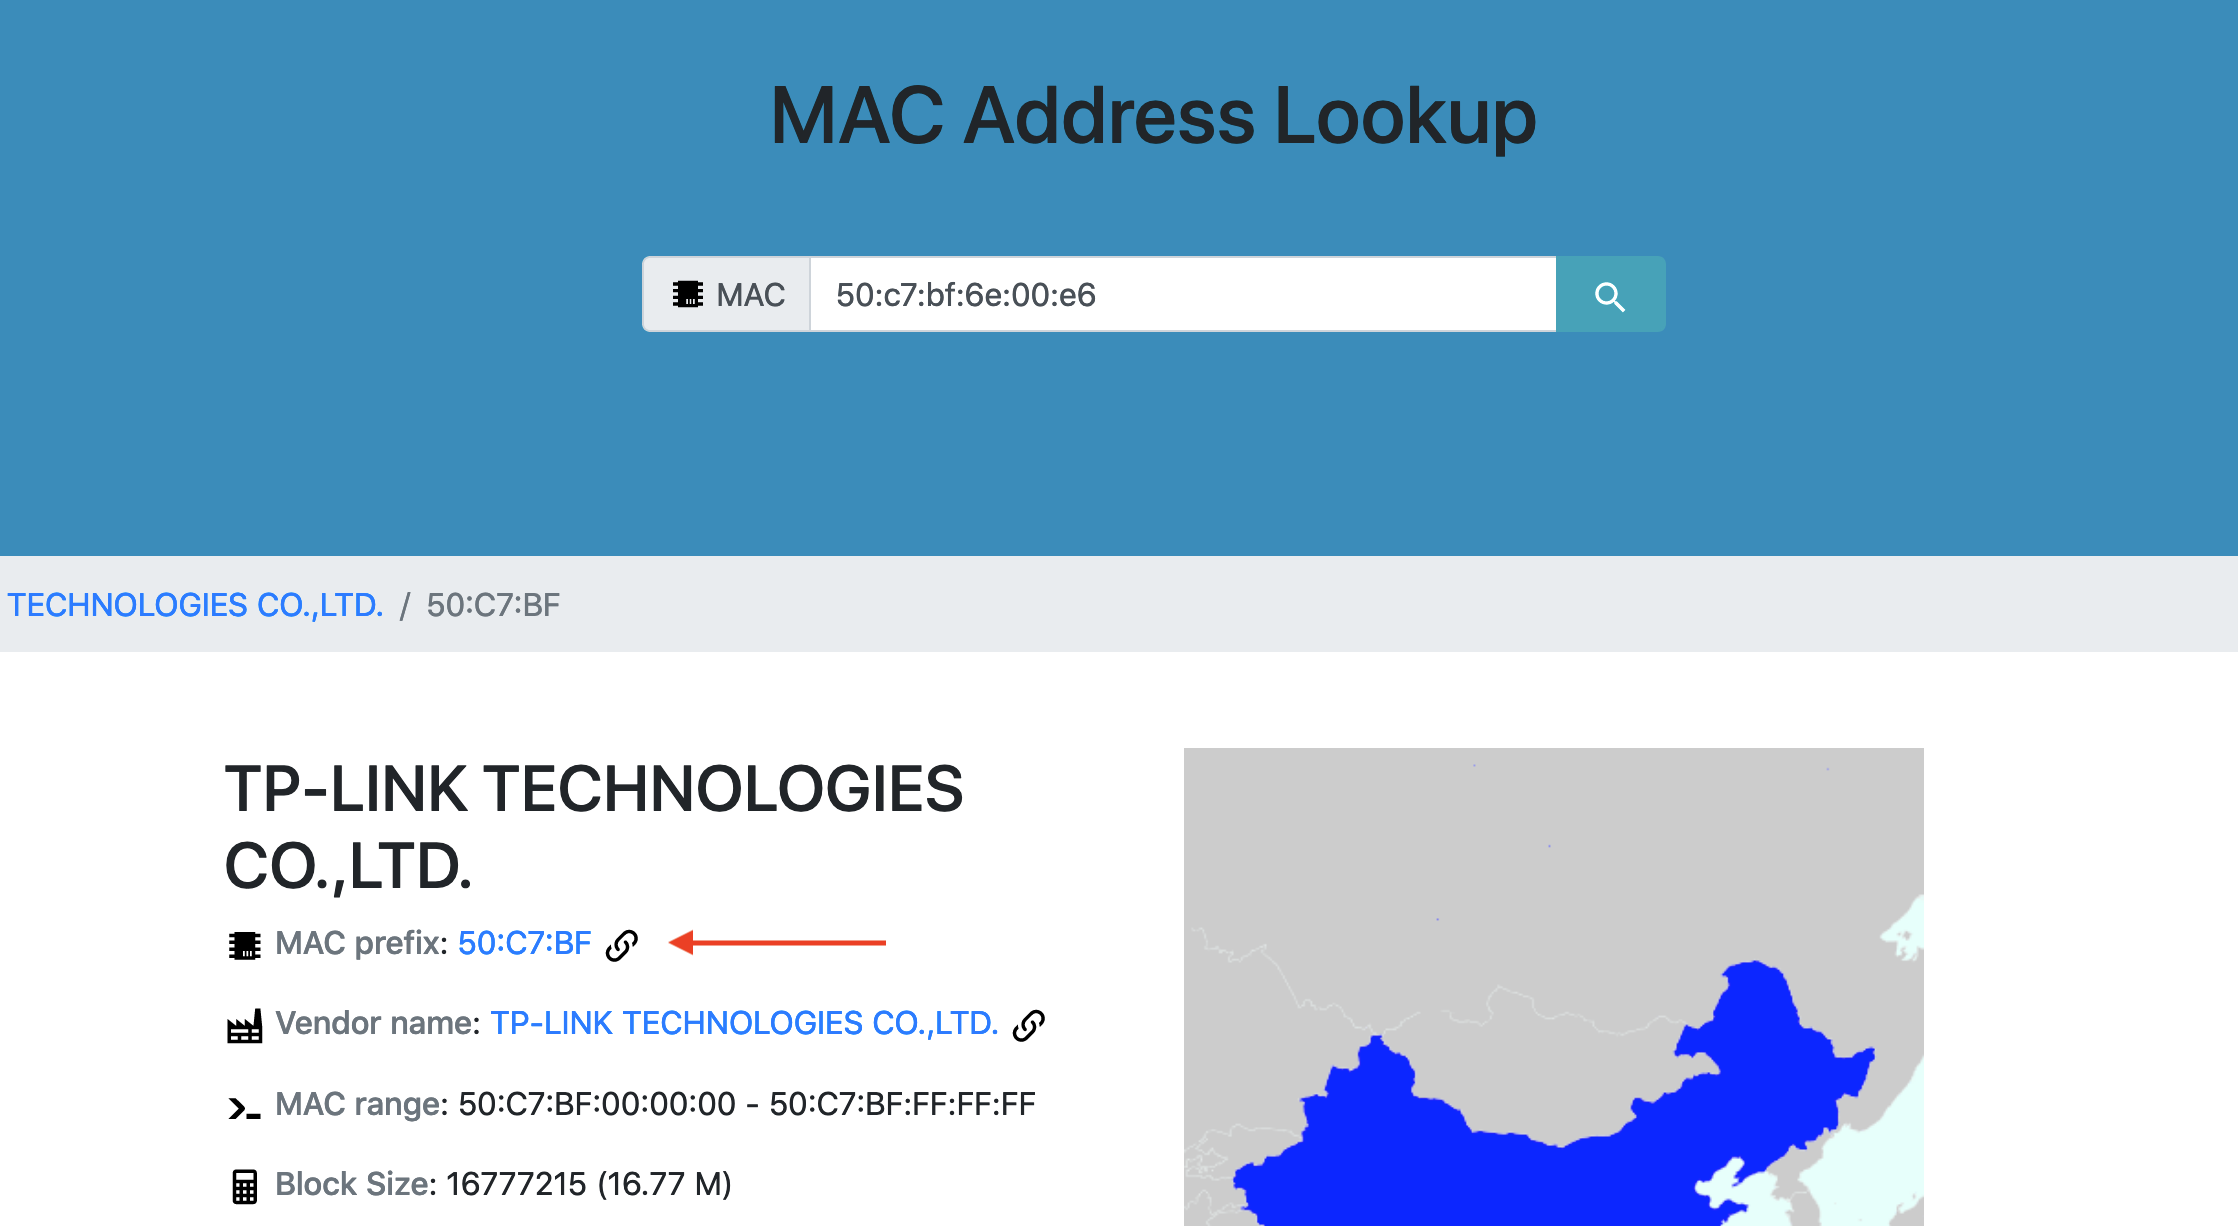
In the resulting page, look for ‘MAC prefix’. It means that all devices starting with this prefix are devices produced by the resulting vendor.
Let’s add a dictionary of vendors in our discover.py so that we link MAC addresses to a given vendor.
# dictionary of known vendor, per MAC address
mac_vendor = {
    '50:c7:bf': 'TP-Link',
    'DC:A6:32': 'Raspberry Pi'
}
Add another line, separated with a comma, for each MAC prefix that you look up.
Note: your light bulb might have a different start, as TP-Link is selling many products.
We can write a function check_vendor() which will take a MAC address as a parameter, and look it up in our list of MAC vendors.
def check_vendor(mac: str):
    # For each known mac vendor
    for known_mac in mac_vendor:
        # check if it matches with the currnt mac address
        if mac.startswith(known_mac.lower()):
            # return the name of the vendor
            return mac_vendor[known_mac]
    # No match was found with the known vendors
    return 'Unknown'
In the function show_network_device(), we can replace the last line by the following, to show a third element: the result of our check_vendor for the given MAC address.
print("{:16} {} {}".format(device['ip'], device['mac'], check_vendor(device['mac'])))
Let’s execute the script again, to see the vendor of each device.
Step 4 Find the lightbulb automatically
We can now show the list of MAC addresses found with there respective vendors (if known). Let’s write a function find_lightbulb() which will scan the network in the same way, but return the lightbulb IP address instead of showing a list of devices.
def find_lightbulb(target_ip):
    # Let's find the devices connected to the network
    devices = scan_network_devices(target_ip)
    # For each device found
    for device in devices:
        # Check whether the mac address match TP-Link's devices
        if check_vendor(device['mac']) == 'TP-Link':
            # return the ip address of this device
            return device['ip']
    # If we reach the end of the loop, no lightbulb was found
    return None
In src/main.py, in the main() function, let’s replace
lightbulb = Lightbulb(LIGHTBULB_IP_ADDRESS, LIGHTBULB_IP_ADDRESS, LIGHTBULB_PRIVATE_KEY_PATH)
by
lightbulb_ip_address = find_lightbulb("192.168.1.1/24")
lightbulb = Lightbulb(lightbulb_ip_address, LIGHTBULB_THING_IP, LIGHTBULB_PRIVATE_KEY_PATH)
Finally, we need to import our function find_lightbulb() from the discover file. We are then ready to execute.
Merge and Push Once you are done with your development and test cycle, do not forget to merge your branch into your master branch.
You can now try your code on the Raspberry Pi.
Updating the CHANGELOG file In this assignment you have made significant additions to your prototype. Edit the file
CHANGELOG.mdand add what you have achieved in this assignment.
![]()
![]()
![]()
The European Commission's support for the production of this publication does not constitute an endorsement of the contents, which reflect the views only of the authors, and the Commission cannot be held responsible for any use which may be made of the information contained therein.